Posts tagged cooking techniques

A quick clafoutis

Right. Easter this weekend, so we need a recipe with eggs. Avoiding all the usual culprits, I thought a clafoutis would be good – a nice opportunity to get one last pleasure from plum season. They’ve been one bright spot in a pretty drab year for summer fruit.

I was photographing this for the new cookbook, but they do sink FAST, meaning that I couldn’t get a good enough shot, so let’s keep this recipe as a WEB EXCLUSIVE. Awesome.

Being lactose intolerant I rarely cook with cream. My body can handle a bit of cheese here and there and I always just substitute soy milk without any dramas, but cream is a challenge and since my last pregnancy my body has evolved and it’s now a total no-go zone. But in the supermarket I saw a lactose-free cream (in the long-life section), and thought this recipe was a good chance to give it a go… so far so good. Combined with a lacteeze and I might be back on my way to dessert heaven!

Doesn't this look gorgeous? But wait, there's more...

Plum Clafoutis

These quantities are for the small dish pictured. Double the mixture for a large, family-sized flan dish

Butter for greasing
3-4 tbsp caster sugar
3 plums, quartered
2 eggs
2 tbsp plain flour
1/3 cup milk (soy is fine)
1/3 cup cream
1/2 tsp lemon zest
1/2 tsp vanilla extract

Heat the oven to 190C.

Grease an oven-proof shallow dish. Sprinkle and teaspoon of the sugar over the base. Place the plum pieces around evenly.

In a large bowl, whisk the eggs until frothy (a minute or until your arm is too tired to bother any further), add the sugar and keep whisking and combine in the flour, milk and cream. Also pop in the vanilla and zest.

Pour over the plums and bake for 30 minutes or so until golden and firm. Serve with ice cream.

Eggs... cream... more!

Add to FacebookAdd to DiggAdd to Del.icio.usAdd to StumbleuponAdd to RedditAdd to BlinklistAdd to TwitterAdd to TechnoratiAdd to Yahoo BuzzAdd to Newsvine

Comments (1) »

Because wrapping stuff in pastry makes it yum

vegie smugglers beef triangles with vegetables and puff pastry

Yum.

There are several universal truths when it comes to raising Australian children.

1. Getting them into and out of cars is going to be a painful and long-winded exercise. Shoes will be missing; toys lost and drink bottles astonishingly empty (and car seats wet).

2. The more disgusting the public toilet that you find yourself in, the longer your contented child will wish to languish (“the poo is almost here mummy”). And the bigger the incident, the fewer tissues you will have handy.

3. If they are to be struck down with a sudden and violent episode of projectile vomiting, it will be between 3-6am, usually just before you are due to do some incredibly crucial work thing.

On a brighter note, it is also true that things covered in pastry are yummier and much more likely to be eaten by your delightful youngsters.

Which is why the Vegie Smugglers cookbook features quite a few recipes making the most of the adored, yet not exactly healthy stuff. Being a mum, not a dietitian, I have the advantage of not freaking out at the idea of utilising some less healthy ingredients for the greater nutritional good.

Puff pastry though, is very high in fat – even the 25% reduced fat stuff. Use it occasionally and make sure that you make the most of it by cramming in all sorts of good ingredients – like my sausage rolls, which are full of mushrooms and lentils. (In the book I’ve got salmon pots full of broccoli and a fruit treat jammed full of apples, pear and prunes – which may help speed up your public toilet visits considerably).

Today’s recipe is a glorious Indian-inspired dish. Just a hint of spice gets the kid’s palettes keen for more exotic flavour and opens the door to a whole new cuisine (unless you’re Indian, in which case you might prefer a bolognaise or lasagne for a bit of cross cultural goodness). This mince filling is also good on baked potatoes and freezes perfectly for a couple of months.

Beef triangles

1 tbsp vegetable oil
1 onion, finely diced
2 cloves garlic, crushed
500g beef mince
1 tsp curry powder
1 carrot, peeled, grated
1 cup frozen peas, thawed
½ red or yellow capsicum, deseeded, finely diced
½ cup beef stock
1 tbsp soy sauce
Black pepper
5 sheets frozen puff pastry
1 egg, whisked, for glazing

Fruit chutney, to serve

Preheat oven to 190C.
Heat the oil in a frying pan over medium-high heat. Add the onion and garlic and cook until onion is soft. Add mince and brown, breaking up lumps as you go. Add curry powder and all the vegies and mix well.

Add the stock and soy sauce and simmer vigorously over medium-high heat until most of the liquid is evaporated and the vegies are soft. Season with pepper.

Cut each pastry sheet into four squares. Place 2 tbsp of mixture in the centre of each square. Fold diagonally to create triangles, pressing firmly on the edges to seal well.

Brush with egg and bake on oven trays lined with baking paper for 10-15 minutes until golden. Serve beef triangles with chutney.

MAKES 20

Add to FacebookAdd to DiggAdd to Del.icio.usAdd to StumbleuponAdd to RedditAdd to BlinklistAdd to TwitterAdd to TechnoratiAdd to Yahoo BuzzAdd to Newsvine

Leave a comment »

Hippie food for hi-tech kids

It’s time to brush off the cookbooks from the 70s and revisit the health food section of the supermarket. Don’t be scared, everything is going to be OK.

Remember that kids have no inborn aversion to cliched hippie food like lentils and tofu. They will take their cues from YOU, so challenge your own food aversions and experiment a little. You might even find, that ‘health food’ meals like these lentil burgers are actually delicious and quickly become family favourites. They’re nutritious, quick and easy to make and individual patties can be frozen (find full freezing and defrosting instructions in the book).

lentil burger recipe

Lentils made delicious.

Lentil burgers

400g can brown lentils, rinsed, drained
1 cup mashed sweet potato (or plain potato)
1 carrot, peeled, grated
3 spring onions,
finely chopped
1 clove garlic, crushed
Grated rind from
1 lemon
1 egg, lightly whisked
2 tbsp tomato chutney
½ cup fresh breadcrumbs
Salt & black pepper

Canola oil cooking spray

Avocado and tomato slices, lettuce, burger buns and plain yoghurt, to serve

Combine all of the ingredients in a large mixing bowl. Use your hands to really combine everything well. Form patties (whatever size suits your family) and place on baking paper on a plate. Cover with plastic wrap and refrigerate for 10-20 minutes.

Heat a non-stick frying pan over medium-high heat. Spray pan with cooking spray. Cook the patties for 5-6 minutes on each side.

Serve with avocado, tomato, lettuce and a dollop of yoghurt on a burger bun. These are also delicious in wraps dolloped with tzatziki.

SERVES 2 ADULTS & 2 KIDS

Add to FacebookAdd to DiggAdd to Del.icio.usAdd to StumbleuponAdd to RedditAdd to BlinklistAdd to TwitterAdd to TechnoratiAdd to Yahoo BuzzAdd to Newsvine

Comments (5) »

What the kids eat in… Mexico (part 2)

Recently we were having all sorts of discussions about quick summer dinners and the challenges of vegie smuggling in salads. Hiding vegies in salads is much harder and these dishes are best for kids further along on the smuggling scale (ie, they’ll tackle vaguely identifiable stuff).

If you’re lucky enough to have herbivorous kids like that, then you’ve got a great range of tasty dishes awaiting you. Including these Mexican-inspired side dishes. They’re perfect in tortillas (jumbled together, with or without some grilled chicken or fish) or dollop small amounts on crackers for pre-dinner snacks. They’re even good on burgers and on top of hotdogs.

Adults can top theirs with some pickled jalapenos or fresh chilli and before you know it, dinner is served. Quickly, freshly and packed full of nutrition.

I’m giving you my guacamole recipe here. For the salsa and mexi-beans recipes…. well you’ll find them on page 121 of the cookbook.

guacamole salsa recipe

Margaritas, sombreros and a bit of goodness on the side

Guacamole

1 avocado, peeled, diced
2 spring onions, finely diced
Juice of 1/2 lemon
1/2 garlic clove, crushed (optional, but recommended)
1/2 cup cottage cheese
1 tbsp finely chopped coriander (optional)
Salt & pepper

Combine everything in a small bowl. Season to taste.

Add to FacebookAdd to DiggAdd to Del.icio.usAdd to StumbleuponAdd to RedditAdd to BlinklistAdd to TwitterAdd to TechnoratiAdd to Yahoo BuzzAdd to Newsvine

Leave a comment »

My domestic sham EXPOSED!

Vegie smugglers banana bread recipe

A boon for modern housewifery, a recipe that relies on rotting ingredients.

Each year, Australians throw away $516 billion worth of food. That averages out to $616 per household. Usually I’m conscientious about this, but lately I’ve had to contend with THE ANTS.

In the last week THE ANTS have invaded and forced me to throw away brown sugar, 5 packets of pineapple/sultanas, flaked almonds, an olive loaf and 3 peaches (they were INSIDE!) They’re even into the peanut butter (we’re now just picking out the dead ones and plowing on regardless). No amount of vacumming, tidying, spraying, drowning or baits is getting rid of them.

They are making me feel like a slovenly housewife. They trail past, mocking my cleaning and trying to steal my ingredients.

And you see, it took a bit of coercing to convince my best-friend that I’d be better off working from home (for less money) and looking after everyone. We’d always been a strictly 50/50 feminist arrangement and shifting to more traditional roles was always going to be tricky for everyone. The new arrangement has been going well for a year now but these ANTS are giving me bad press. It’s depressing.

So let’s cheer ourselves up with cake. And let’s call it ‘bread’ to make ourselves feel less weak-willed. I know that none of us are under any delusions that banana ‘bread’ is healthy. It’s full of butter. But sometimes you just need sweets and if you do, then ease your conscience with a tonne of bananas, dates and walnuts (which are apparently, one of the best plant sources of protein).

Even better, this recipe is actually a congratulations to all of you fellow slovenly housewives who have allowed your bananas to droop and brown. A friend (and master baker) confided recently that the secret to her ‘bread’ was to wait until the bananas are practically liquid. There are not many ingredients and recipes that require you to be quite so domestically impeded. Enjoy.

(The best) banana bread

1½ cups self-raising flour
½ cup brown sugar, firmly packed
½ cup dates, chopped
½ cup walnuts, chopped
100g butter, melted
2 eggs, beaten
4 over-ripe bananas, mashed

Preheat the oven to 180C. Grease a 14x20cm loaf tin and line the bottom with baking paper.

Sift the flour into a large mixing bowl. Stir through the sugar, dates and walnuts.

Pour over the butter and mix through. Add the eggs and mashed banana. Mix until combined (don’t overmix).

Spoon into the loaf tin. Bake for about 50-55 minutes until a skewer comes out clean (cover with foil if it starts to brown too much around the 40 minute mark).

Add to FacebookAdd to DiggAdd to Del.icio.usAdd to StumbleuponAdd to RedditAdd to BlinklistAdd to TwitterAdd to TechnoratiAdd to Yahoo BuzzAdd to Newsvine

Comments (15) »

What the kids eat in… China

Actually, I suspect more folks outside of China might actually eat this dish. But let’s not worry about pesky facts and just enjoy this delicious messy mass of tasty goodness. I did try to research the origins, but perhaps it’s one of those ‘from everywhere’ dishes with no particular source, although I did see claims of origin from Thai to Cantonese to the good ol’ USA. One cute internet fact (and maybe even true) is that the name translates as ‘lettuce delights’, which sounds so lovely!

I got thinking about this dish after my 14-year-old niece whipped up a version at a recent family get-together. At 14 I could melt cheese onto corn chips in the microwave, she can whip up a meal for 12 people. Very impressive stuff. The kids LOVED having her cook for them and ate up every little morsel. So I’m naming this dish in her honour.

Apparently teenagers aren’t necessarily too fussed on vegies either, so I’ve built on her recipe quite a bit, smuggling in a stack load more vegies. Use iceberg lettuce to wrap the mixture up as tightly as possible. The result is hot/cold/crunchy and absolutely delicious. Just keep a washer handy and lettuce delight indeed…

Chicken mince in sang choy bow

Lettuce delights for your munching pleasure

Sarah’s sang choy bao

Sauce
2 tbsp shao hsing wine
1 tbsp soy sauce
1 tbsp oyster sauce
1 tsp sugar
1 tsp corn flour

Lettuce leaves (iceberg or cos both work well)
1 tbsp peanut oil
1 onion, finely diced
500g chicken mince
1 tsp garlic, minced
1 tsp ginger, minced
4 green onions, finely sliced
225g tin water chestnuts, drained, finely diced
1 cup mushrooms, finely diced
1 carrot, peeled, grated
125g can corn kernels

Combine all of the sauce ingredients together and set aside. Carefully remove whole lettuce leaves, wash and drain on clean tea towels.

Heat the oil in a wok or large frying pan over medium/high heat. Add the onion and stirfry for 3-4 minutes until translucent and turning golden.

Add the chicken mince and stirfry until it changes from pink to white. Break up lumps as you go to ensure there are no hidden raw bits.

Add the garlic, ginger, green onions, water chestnuts, mushrooms, carrot and corn. Stir-fry for 3-4 minutes until the green onions are tender and the mushrooms are nice and soft. Pour the sauce over the top and stir-fry for another minute or two until everything is piping hot and cooked thoroughly. (NOTE: if you are making this to reheat later, leave everything slightly undercooked)

Spoon -1 cup quantities of mixture into the lettuce leaves, wrap up carefully and enjoy!

Add to FacebookAdd to DiggAdd to Del.icio.usAdd to StumbleuponAdd to RedditAdd to BlinklistAdd to TwitterAdd to TechnoratiAdd to Yahoo BuzzAdd to Newsvine

Comments (7) »

Try, try and very trying

Apparently repetition works really well with children. Perhaps that’s the reason why I have to stand there and say “put your shoes on” multiple times – and with increasing volume – every single time we need to get ready to leave the house. But does repetition really work with food? We are told, often, to offer the kids an ingredient 6-10 times and eventually they will try it.

You can read all about food repetition at the ABC online, Better Health VICWestmead Hospital, School Canteens, Sixty second parent, Jackie French, PGR network, Australian bananas, Yoplait and Bubhub.

Zzzzzzzzzz. Sorry! Still with me? Yep, that’s right. 10 examples of people telling you how long to persevere in your quest to get the children eating their greens. Are they for real? Who, in their right minds, is masochistic enough to suffer the cruelties of dinner refusal 10 times?

When I hear “I don’t like it” for the first time, I will deal with it in an understanding way. I will revisit the recipe and adjust it in a way I think will be preferred the next time I cook it. The second time, I cross my fingers and if there is an outright refusal this time, then I’m done! Safe to say that that recipe will not get cooked again.

Try not to be too discouraged when this happens. While some recipes might not be right for your family, it doesn’t mean you have to skip an ingredient entirely. Switch to another recipe that smuggles the same target vegie and try that. Mushrooms might be rejected in a The best ever vegetarian lasagne but they might be devoured in Vegie slice.

I think the feed them 10 times advice is one of those myths like brushing your hair 100 times will make it shinier and using certain beauty products night and day for 3 months will make you more beautiful. NO ONE can keep up the commitment, so the myth is never really tested.

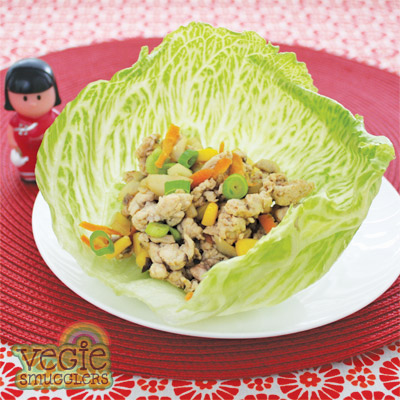
Anyhow, let’s save you all the trouble and just give you a recipe for this tuna pasta bake that gets devoured first time every time (and it cleverly disguises corn, zucchini and capsicum).

Tuna pasta bake recipe hiding corn, zucchini, carrot and capsicum

Aim for a hole in one with this tuna pasta bake recipe


Lulu’s favourite tuna pasta bake

Don’t skip the step of infusing the milk – it’s the crucial taste factor.

1 small brown onion, roughly chopped
2 bay leaves
10 black peppercorns
Small bunch herbs of your choice (parsley, thyme, rosemary)
3 cups milk
250g dried wholemeal pasta spirals
60g unsalted butter
2 tbsp plain flour
1 tbsp Dijon mustard
Splash of white wine (optional)
425g can tuna in springwater, drained
125g can corn kernels, drained
1 zucchini, grated
1 carrot, peeled, grated
½ red capsicum, deseeded, finely diced
1 cup grated cheese
2 tbsp breadcrumbs

Preheat oven to 180C.

Combine the onion, bay leaves, peppercorns, herbs and milk in a saucepan. Bring to the boil. Remove from heat immediately and leave to cool.

Cook the pasta in a large saucepan of boiling water according to packet directions. Drain and set aside.

Pour the infused milk through a sieve into a jug (discard onion and herbs).

In a saucepan (non-stick is good), melt the butter over low-medium heat. Add the flour and use a wooden spoon to stir for 1 minute until bubbling. Gradually add the infused milk and keep stirring the whole time to avoid lumps. Bring to the boil and thicken until the sauce sticks to the spoon (about the consistency of custard). Remove from the heat and mix in the mustard and wine (if using).

In a large bowl, mix the pasta, tuna and vegies together with the sauce. Spoon into a baking dish and top with the cheese and breadcrumbs.

Bake for 25 minutes until bubbling and golden. Serve topped with parsley sprigs.

SERVES 2 ADULTS & 4 KIDS

FOR THE ADULTS Kids can eat this on its own but adults like a nice leaf salad and – if you’re not carb-phobic – crusty bread (and white wine).

Like This!

Comments (3) »

Potato détente

At the risk of trivialising and being flippant about the Anzac legend and the atrocities of World War I, dinner time at my house does on occasion have me contemplating the war strategies faced by the German leaders of the time. Just as things calm down on one front, another opens up and just as the French are learning to sit still and eat their peas, the Russians start screaming “I don’t want anything mushy”.

What I’m clumsily saying is that the food and vegetable fight is fought on two battlefronts at my house. There’s the flavour battle, which is one I’m winning, thanks to my ever-growing stockpile of smuggling recipes. But then there’s the texture war. While Corporal Meat-and-Potatoes refuses mush or any soft food, Lieutenant Fruitarian fights anything too chewy or requiring too much utensil work and I struggle to find a happy balance.

Unlike the mums on the homefront in 1914, I do have a few mod cons working to my advantage, the freezer being a particularly useful one. Whilst I refuse to cook two dinners in one night, I do have to make textural concessions. I can get them eating the same piece of protein (ok, yes, perhaps it is just sausages), but potatoes for Mr Meat-and-Potatoes are best served chopped into chunks, tossed in oil and baked for 25 minutes and Miss Fruitarian gets a serve of this mash.

To avoid daily inconvenience, make a huge quantity of this recipe. Freeze large spoonfuls on oven trays and when solid, transfer to freezer bags for easy storage.

End the war with a stockpile of mash in the freezer.

Vegie Mash

1 carrot, peeled, diced
1 swede, peeled, diced
4 potatoes, peeled, diced
1 zucchini, grated (peel first if your child is scared of green bits)
1 cup grated cheese
¼ cup milk
Olive oil
Salt & black pepper

Bring a large saucepan of water to the boil. Add the carrot and swede and boil for 5 minutes. Add the potato and boil for 10-15 minutes more. Use a fork to test that the vegies are cooked enough to mash easily. Drain.

Meanwhile, place the zucchini in a microwave-proof dish, cover and zap on high for 1 minute. Drain any excess water.

Mash the carrot, swede and potato for as long as you need to get the texture your kids will enjoy. Stir in the cheese and zucchini – the cheese should melt nicely. Add the milk and olive oil as needed to get a nice creamy texture. Season to taste.

On a good parenting day, serve this with fish fillets baked in lemon juice and herbs. On a bad day, add drained canned tuna. On a terrible day, serve with an enticing dollop of tomato sauce and peas.

SERVES 2 ADULTS & 4 KIDS AS A SIDE DISH

FREEZING & DEFROSTING INSTRUCTIONS
Scoop separate portions onto an oven tray, cover with a large freezer bag and freeze for a couple of hours. Once frozen, snap them off the tray and store in a freezer bag back in the freezer. Squeeze as much air out of the bag as possible. Use within 1 month. Reheat in the microwave, stirring every minute until steaming hot.

Like This!

Comments (5) »

Chop chop!

A bowl of chopped ingredients

Cut the vegies up finely so that little fingers can't pick them out

Back in my post, top ten ways to smuggle vegies into kids, I touched on the concept of chopping things small. It solves the huge problem of targeted foods being picked out of the meal.

For instance, last night I’d made a vegie and ham muffin and my daughter, who was hoovering it down, did stop to ask, “What’s the red stuff?”.
“Sweet, delicious, red capsicum”, said I, valiantly trying to sell it in and avoid a muffin fiasco.
“I don’t like it” she said.
“Oh well,” I tried to act casual, hoping she couldn’t see the rising panic (you see, I know that once she rejects something, chances are little brother will loyally follow). “Oh well, they’re so small, just don’t look at them. As a general flavour you seem to like it?”.
She did quite like it. And the offensive red stuff was just tiny flecks here and there. So she ate it. And there is the joy of chopping things up finely.

So the best way to do it? My all time favourite would have to be a hand-held food processor like these. Or if you’re a member you can check out the Choice review of hand-held blenders. I use the pulse function on this all the time to do an easy, quick chop. You do have to watch it though and not turn everything into pastes and purees.

You can’t beat a good knife and basic knife-skills. Want a general tutorial on basic chopping techniques? See an astonishingly fat man with a light touch and a nice teaching manner here.

Or Men’s Health has a basic tutorial here. Typically on a video by men, for men, it starts with a discussion on knife size (8 to 12 inches is fine).

However, the most succinct and helpful is by a NY cooking teacher here. She’s also a little size obsessed – happy with just the 8 inch, but it has to be a good 2 or 3 inches wide.

Good luck!

Leave a comment »